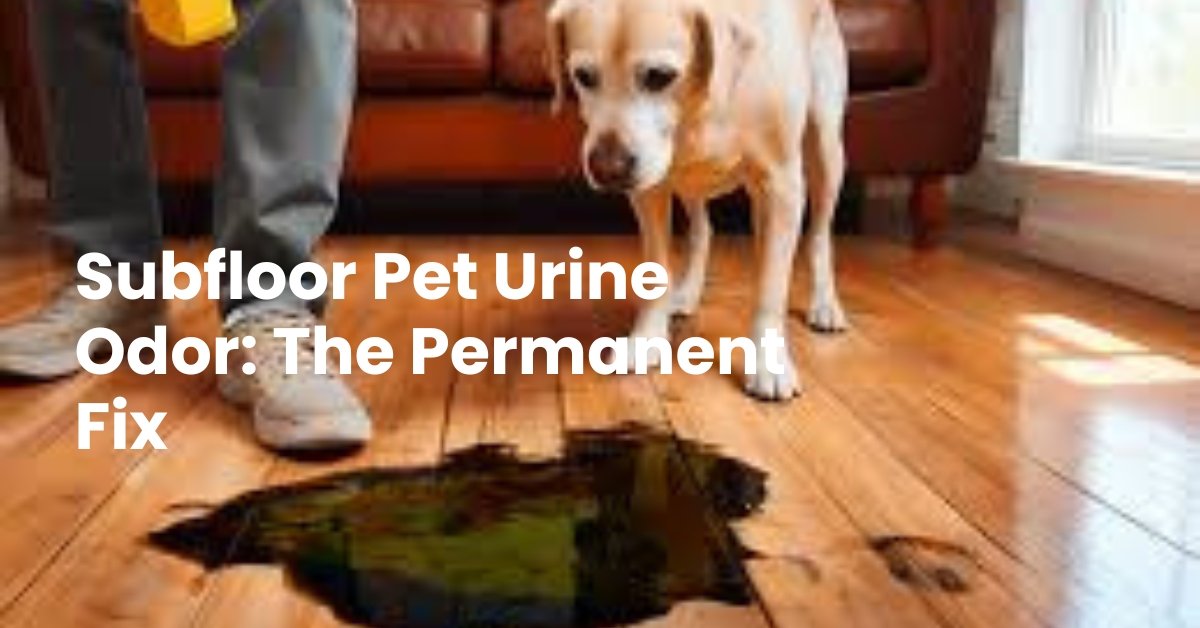
If you cleaned the carpet, replaced the padding, or used multiple enzyme sprays and the urine smell still returns, there is a strong chance the odor is coming from the subfloor. This is one of the most frustrating scenarios for homeowners because the room can smell fine for a while and then suddenly the odor comes back when humidity rises, heat turns on, or the floor gets lightly re-wet from cleaning.
The good news is that subfloor urine odor can be fixed permanently. The key is to stop treating the surface and start treating the structure. In this guide, you will learn how to confirm subfloor contamination, why the smell keeps coming back, and the best permanent solutions, including treatment, sealing, repair, and replacement when necessary.
What a subfloor is and why it holds urine odor
The subfloor is the structural layer under your finished flooring. Under carpet it is commonly plywood or OSB. Under tile it may be cement board over plywood. In some homes it can include concrete slabs. Subfloors are often porous or have micro gaps that allow liquids to soak in and spread.
Urine odor persists in subfloors for three main reasons.
First, urine penetrates below the surface and dries inside the pores where normal cleaning cannot reach.
Second, repeated accidents build up residue over time, especially in the same area.
Third, humidity and heat reactivate odor molecules. Even if the floor looks clean, subfloor residue can release odor again under the right conditions.
This is exactly why many people experience the cycle explained in Blog 1, why cat urine smell keeps coming back, even after cleaning. The odor is not returning magically. The source remained in the structure.
Signs the subfloor is the real problem
Before you commit to sealing or repair, confirm the subfloor is involved. These signs make subfloor contamination more likely.
- The smell returns after carpet cleaning or shampooing.
- The smell increases on humid days or during rain.
- The smell is strongest near the floor, even when the carpet looks clean.
- You replaced the carpet or padding and the smell still returned.
- The odor is concentrated in one area that has a history of repeated accidents.
- The odor is near a wall corner, doorway, or furniture edge where pets often return.
- You can smell urine even when the room has been closed for a few hours.
If you want a structured method to locate the exact zone first, follow Blog 2, how to find hidden pet urine odor in your home, because it helps you map the hotspot before you decide on repairs.
If you already know the carpet padding is involved, Blog 4, pet urine odor in carpet padding, explains how to decide whether padding can be saved or must be replaced. The subfloor step is what comes next when padding replacement alone does not solve it.
How to confirm subfloor contamination
You do not need to guess. You can confirm subfloor involvement with a simple process. The goal is to compare odor intensity above the carpet versus directly at the subfloor.
Step 1 Identify the strongest area
Use the detection checklist from Blog 2. Your aim is to find the smallest zone where odor is strongest. This prevents unnecessary work.
Step 2 Access the subfloor if possible
If you can safely lift a carpet corner or a seam near the suspect zone, smell the underside of the carpet, then smell the padding, then smell the subfloor itself. If the subfloor has the strongest odor, you have your answer.
Step 3 Perform a controlled reactivation test
Lightly mist a small section of the suspect subfloor area with plain water. Wait 10 to 15 minutes, then smell again. If odor intensifies, that suggests dried residue in the subfloor is releasing odor when rehydrated.
Step 4 Look for discoloration patterns
Subfloor contamination sometimes shows dark staining, rings, or a widespread uneven pattern. Visual signs are not always present, so rely more on odor intensity than appearance.
If accessing the subfloor is not practical, or if you want certainty before investing in repairs, an odor inspection service is the safest next step. It reduces trial and error and helps you avoid treating the wrong area.
Why DIY cleaning often fails once urine reaches the subfloor
Many homeowners try enzyme cleaners, steam cleaning, and deodorizing sprays. These can reduce smell temporarily, but the odor returns.
The reason is depth. Enzyme products work when they reach the contamination and have enough dwell time. On a subfloor, urine can be inside the wood fibers or inside seams. If the product does not penetrate enough, it cannot neutralize the deep residue.
Blog 3, enzyme cleaners vs professional pet odor removal, explains this difference clearly. DIY can work on fresh surface accidents, but structural involvement requires structural solutions.
The permanent fix options for subfloor urine odor
There are three permanent categories of solutions.
First is deep treatment when contamination is mild and accessible.
Second is sealing when contamination is moderate and absorbed.
Third is repair or replacement when contamination is severe or the material is damaged.
Your best choice depends on depth, repetition, and whether the wood is compromised.
Option 1 Deep treatment when contamination is mild
Deep treatment can work when the accidents were limited and the subfloor is not deeply saturated. It requires proper saturation, dwell time, and drying.
A realistic deep treatment process looks like this.
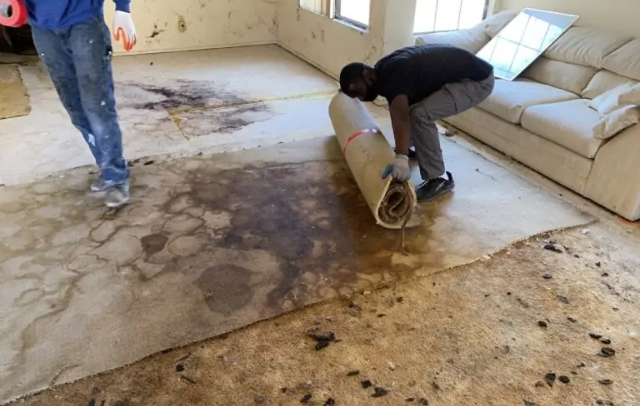
Step 1 Remove carpet and padding in the contaminated zone if possible. Treating through carpet rarely reaches the subfloor effectively.
Step 2 Clean the surface gently. Do not flood. The goal is to remove surface residue without spreading contamination.
Step 3 Apply a professional grade urine neutralizer or enzyme solution and allow adequate dwell time.
Step 4 Extract and dry thoroughly. Drying is not optional. If moisture remains, odor can linger and materials can warp.
Step 5 Reactivate test and verify. Lightly mist and smell again after drying. If odor returns, you likely need sealing.
This option is best when you want to avoid sealing and the contamination is limited. The risk is that mild treatment fails when the contamination is deeper than it appears.
Option 2 Subfloor odor sealing when contamination is moderate
Sealing is one of the most reliable permanent solutions when urine has absorbed into wood. The logic is simple. If you cannot remove all residues, you can encapsulate and block them so they cannot release odor again.
Subfloor odor sealing typically involves cleaning and preparing the surface, then applying an odor blocking sealer designed for this type of contamination.
Sealing is not the same as painting. If the surface is not prepared, odor can leak through seams or untreated edges.
A proper sealing process usually includes these steps.
Step 1 Identify the full contaminated zone. If you seal only the visible stain and ignore the spread area, odor can still escape from the unsealed edges.
Step 2 Remove any loose material or damaged sections. If the wood is crumbling or swollen, sealing may not bond correctly.
Step 3 Clean and dry. Sealers bond best to dry surfaces.
Step 4 Apply the sealer evenly and extend beyond the contaminated zone. This prevents edge leakage.
Step 5 Allow full cure time before reinstalling padding and carpet. Rushing can trap odors or create adhesion issues.
Step 6 Verify after cure. Smell tests and reactivation checks help confirm success.
Option 3 Repair or replacement when contamination is severe
Sometimes the subfloor is too damaged to seal effectively. Severe cases include repeated accidents over months, heavy saturation, structural swelling, softness, delamination, or mold risk from long term moisture.
If the subfloor is compromised, replacement of affected sections is often the most permanent fix. Replacement is more involved but removes the contaminated material entirely, reducing the chance of odor recurrence.
A repair and replacement approach usually looks like this.
Step 1 Remove carpet and padding, and confirm the boundaries of contamination.
Step 2 Remove damaged subfloor sections and inspect joists and adjacent materials.
Step 3 Replace subfloor panels and seal edges and seams to prevent future absorption.
Step 4 Install new underlayment, padding, and flooring.
Step 5 Verify odor elimination before final installation when possible.
When urine has also migrated into walls, baseboards, or drywall edges, you may need targeted wall repair. That is where Drywall Odor Removal and Repair becomes relevant.
Special situations that change the best solution
Urine near a wall corner
Urine near corners can wick upward into drywall edges and behind baseboards. In these cases, sealing the subfloor may remove most odor but a faint smell can persist from the wall. Always check baseboards and drywall edges if the hotspot is at the wall line.
Odor after carpet and padding replacement
If you replaced carpet and padding but odor returned, the subfloor is the prime suspect. It can also be trapped in tack strips or the perimeter gap. A professional inspection often catches these hidden sources.
Concrete slab homes
Concrete can hold odor in porous areas and hairline cracks. The solution may involve cleaning and applying a concrete appropriate sealer. The strategy is similar, but product selection differs.
What to expect during a professional subfloor odor fix
Homeowners often ask what the process feels like in real life. Here is the typical experience.
First, inspection and mapping. This is where the team identifies the full contaminated area so the fix is complete.
Second, removal of affected surface layers if required, such as carpet and padding.
Third, treatment and or sealing depending on severity.
Fourth, curing and drying time.
Fifth, verification. The goal is no odor return under normal humidity and HVAC conditions.
If your case started with repeated cat accidents, a specialized Cat Urine Odor Removal service is often bundled with subfloor sealing because cat urine can be especially persistent. If the issue is from dog accidents, Dog Urine Odor Removal may be the correct paired service.
How long does it take to fix subfloor urine odor
Timeline depends on severity and method.
Mild treatment may take one day plus drying and verification.
Sealing may take one to two days depending on prep and cure time.
Replacement may take multiple days depending on how much flooring needs removal and reinstall.
A realistic plan includes verification time. Many odor issues “seem” fixed immediately but return when humidity changes. Verification helps avoid that disappointment.
Mistakes that cause subfloor odor to come back even after sealing
Subfloor fixes fail for predictable reasons. If you avoid these, your chances of permanent success increase.
Sealing only the visible stain and not the full spread area
Ignoring seams, edges, and perimeter zones
Sealing over moisture or over dirty residue
Reinstalling flooring before cure time is complete
Failing to check wall edges when the hotspot is near the wall
Not verifying after humidity changes
If you want to prevent these mistakes, use odor inspection and detection first, because it helps confirm boundaries and hidden sources.
Prevention after the fix
A permanent fix is easier to maintain when pets do not return to the same spot.
Block access during and after drying. Replace or deep clean any pet beds that might carry scent back into the area. Consider behavior triggers that cause marking. If accidents continue, even a sealed floor may develop new spots nearby.
Prevention is not only about training. It is also about making sure the old odor is fully neutralized or blocked so pets are not drawn back.
FAQs
How do I know if urine is in the subfloor or just the padding
If odor is dramatically stronger when you access the subfloor, or if odor returns after padding replacement, subfloor involvement is likely. Using the detection checklist from Blog 2 helps confirm the hotspot before you open flooring.
Does sealing the subfloor really work permanently
Yes, when done correctly and when the full contaminated zone is sealed with proper prep and cure time. Failures usually happen when boundaries are missed or the surface is not properly prepared.
Can I seal without removing the carpet
Sealing a subfloor requires access. If the subfloor is the source, you typically need to lift flooring in the affected zone to seal properly.
What if the smell is near a wall
Check baseboards and the bottom edge of drywall. In some cases, wall repair or targeted odor blocking in the wall edge is needed in addition to subfloor sealing.
Is replacement better than sealing
Replacement is best when the subfloor is structurally damaged or heavily saturated. Sealing is often enough when wood is sound but odor is absorbed.